how to make a material design icon in photoshop
As designers, we know what an app icon is: a small graphical symbol that represents an application program. We also know that a successful icon will attract more consumers to the application itself.
In this tutorial, I'll use Photoshop to explain how to make a cool app icon for a pool game application. And the best part: I'll show you how to produce impressive results in a SHORT period of time.
Let's roll!

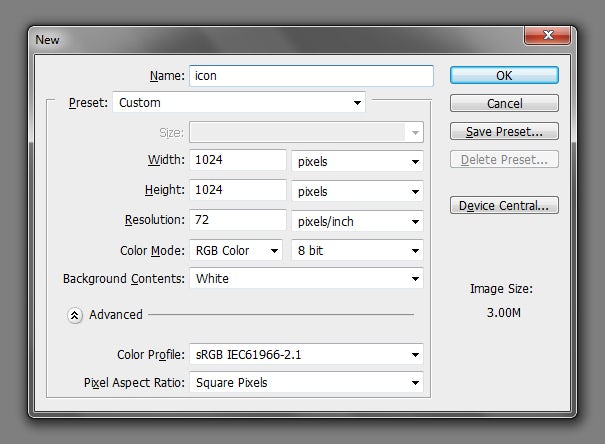
1. Create a new document
We will be designing our icon at 1024×1024 pixels but feel free to design yours at 256×256 or 512×512 pixels.
Since this is going to be used on-screen, we must set the color mode to RGB (not CMYK) and the resolution to 72 pixels (not 300).
2. Draw the 1st shape on the 1st layer
Take the Rounded Rectangle Tool (U), draw a shape then fill it in with color (#b67032).


3. Create a wood effect
Create a wood effect using "fibers" from the filter menu (Filter > Render > Fibers), make sure you set the foreground color with #b67032 and the background color with #72319b.


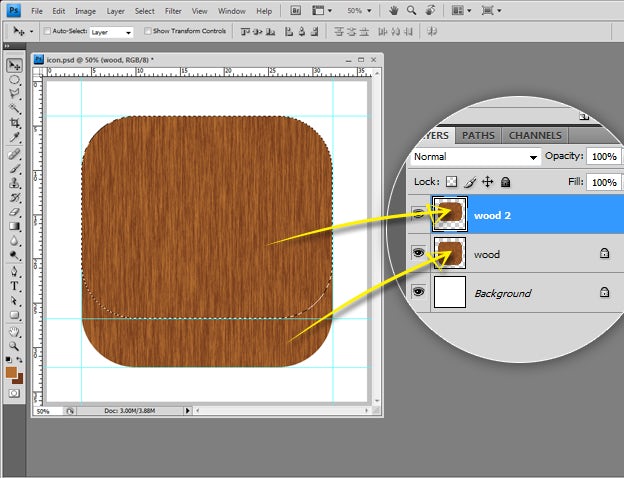
4. Draw the 2nd shape
Again, with the Rounded Rectangle Tool (U) draw the same shape but make it shorter than the first wood shape (about 6 pixels from the bottom).
Use guidelines, if you find it difficult to make both shapes with the same width.

5. Copy the 1st layer onto the 2nd shape
Select the shape (alt + enter), then copy the first layer onto the second shape (ctrl+c then ctrl+v). So now we have two layers with wooden texture but in different heights.
6. Make layer 1 darker
Use the Curves setting (ctrl+m) to make Layer 1 darker than the other.

7. Add depth using the Layer Style settings
Double click Layer 1 in the Layer Palette, then set the Layer Style settings like below.
I only selected the Inner Shadow and Inner Glow settings.


8. Add more depth with the Brush Tool
Add depth to Layer 1 by shading darker colors with the "Brush" Tool (b).

9. Add the Inner Glow effect for Layer 2
Moving onto Layer 2, we are going to turn on Inner Glow. Again, double click Layer 2 in the Layer Palette to get to Layer Style settings.

10. Draw the 3rd shape
Create a new layer and use the Rounded Rectangle Tool and Ellipse Tool to make 2 new shapes (see below).

11. Copy the 2nd Layer onto the 3rd Layer
Select the shape (alt + enter) then copy Layer 2 (ctrl+c then ctrl+v) onto Layer 3. This step is similar to STEP 5 and STEP 6.

Don't forget to darken Layer 3 by adjusting the Curves setting (ctrl+m).

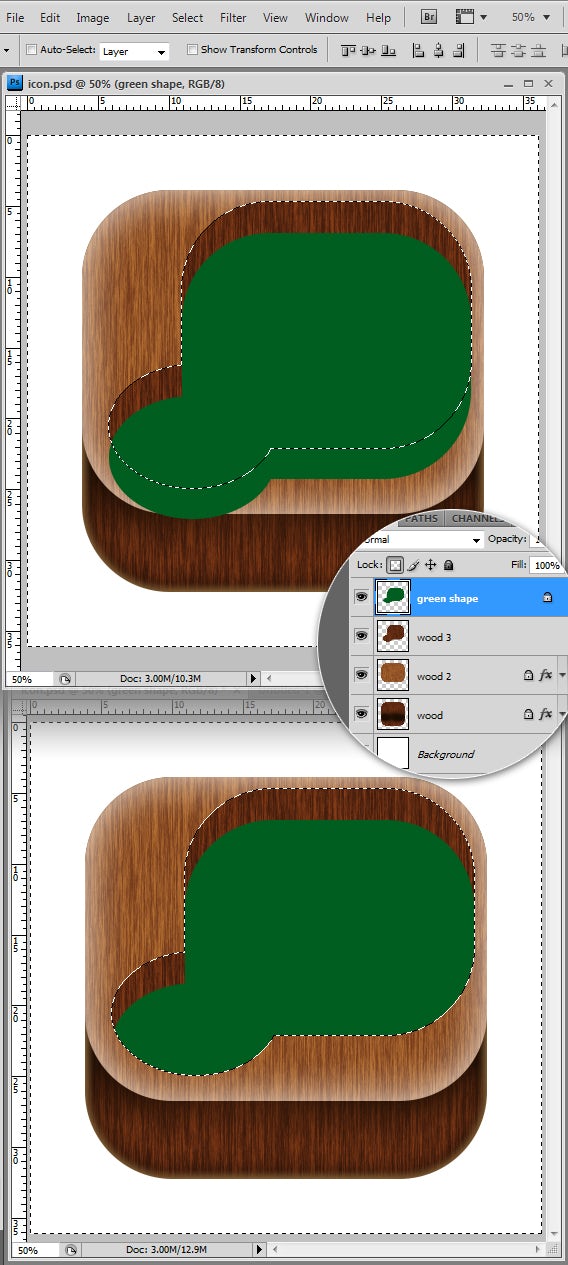
12. Duplicate Layer 3
Duplicate Layer 3 (ctrl+j), fill it (alt + delete) with a green color (#005e20), then move it slightly down. We will call this layer, Green Shape Layer.

13. Cut the Green Shape Layer to fit into Layer 3
Now we want to delete the green area that touches outside of Layer 3. To do this, select Layer 3 by holding the ctrl button and clicking on that layer in Layers Palette. You will see a selection — dotted lines around the elements — is created.
Click back on the Green Shape Layer in the Layers Palette, but make sure the selection you've made is from Layer 3. Then cut (press delete) on the Green Shape Layer .
The Green Shape should be lined up with Layer 3.
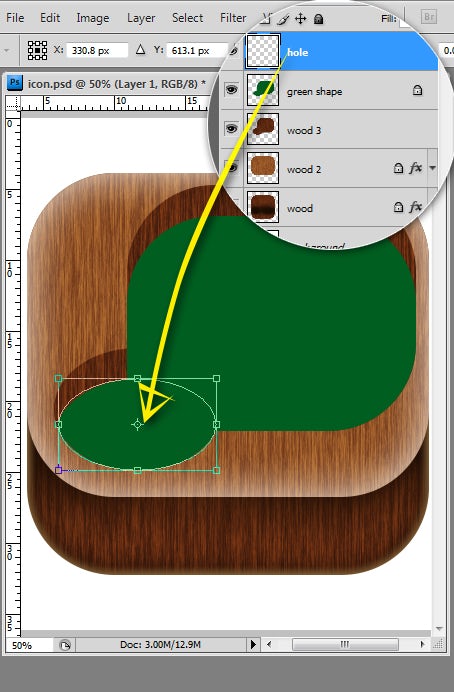
14. Create a pool table hole
Now, make a new shape (and layer) using the Ellipse Tool — fill it in with black.
15. Give Layer 3 an Outer Glow effect
Go back to Layer 3 and give it an Outer Glow effect (see below).

16. Add depth to the Green Shape
Similar to STEP 8, add depth to the Green Shape by adding a darker color with the Brush Tool (b).

17. Add the Noise Filter
Then add "Noise" onto the Green Shape Layer (Filter > Noise > Add Noise).
I gave it about 5% Noise.

18. Add highlights and details
Put another black circle on top of the pool table hole shape, then highlight the back pool table hole using the Brush Tool (b). Add the Noise Filter.


19. Draw a simple ball
- Make a round shape using Elliptical Marquee Tool (m) and fill it with white color.
- Take darker color (#9d956e) and brush (b) the edge of the image to create a soft gradient.
- Use a smaller diameter brush and a lighter color for the second gradient highlight.
- Create a highlight using the Pen Tool (p).
- Then brush (b) that shape to put a glossy touch on the ball.

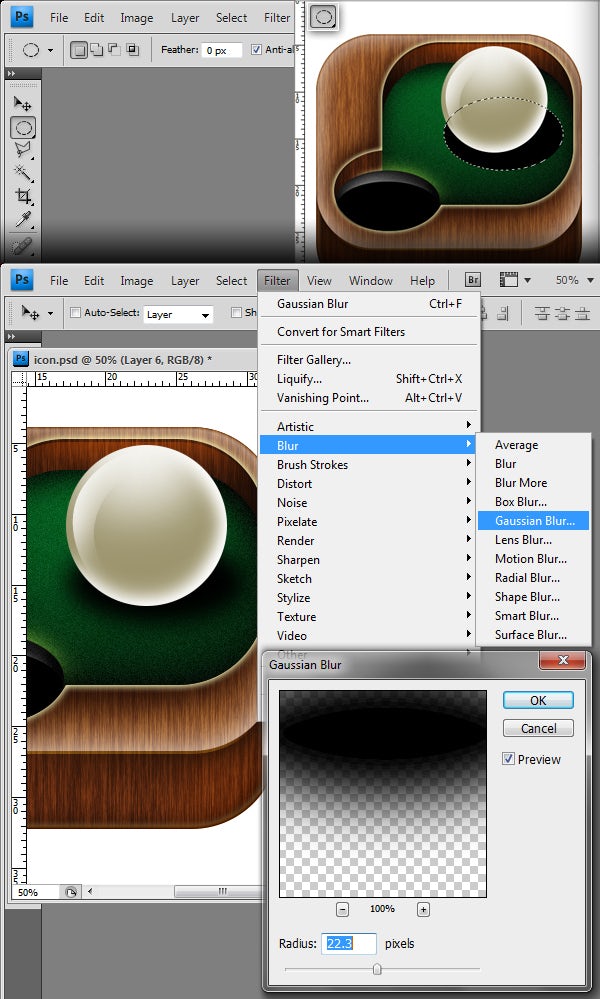
20. Create a shadow for the ball
Last step! Create a black circle under the ball then give it the Blur Effect (Filter > Blur > Gaussian Blur).
And here's the final result!
I hope you enjoyed — thanks for following and good luck with your own designs! 🙂
Need an icon designed for your app?
Our global community of professional graphic designers can do that!
how to make a material design icon in photoshop
Source: https://99designs.com/blog/design-tutorials/create-an-app-icon-using-photoshop-in-20-easy-steps/